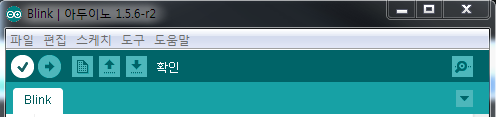
Blink 실행
Arduino Lecture Curation Page
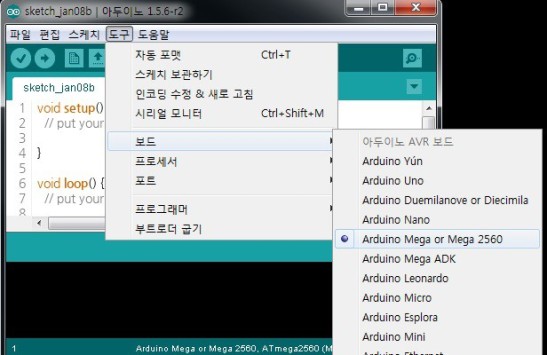
PREVIOUS STEP : ##2 Arduino IDE설치아래의 보드는 강의에 쓰일 Arduino Mega 2560 R3 보드이다.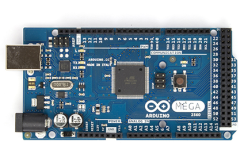
출처 – arduino.cc
Microcontroller – ATmega2560
Operating Voltage – 5V
Digital I/O pins – 54(of which 15 provide PWM output)
Analog Input Pins – 16
Flash memory – 256Kb
회로도 – View
Datasheet – ATmega2560아래의 Arduino Mega 2560 R3의 핀맵이다.
PC의 Comport와 실습보드를 확인해보자!
먼저, 내컴퓨터 > 속성 > 장치관리자 로 들어가서 확인
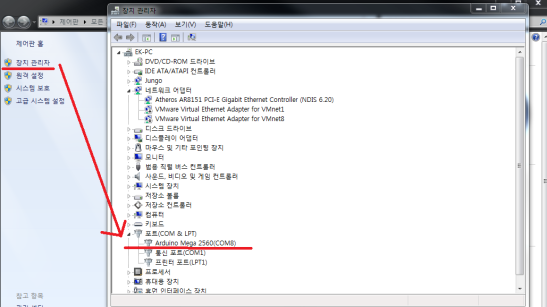
PC는 COM port8에 설정되어있다.
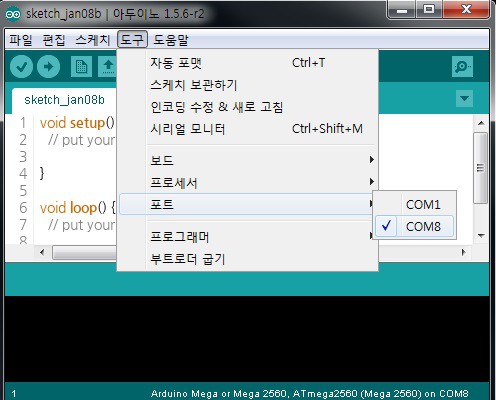
- Arduino IDE를 열어, COM port와 Device Setting을 확인하자!
COM port 확인
Arduino 프로그램의 구조 부터 알아보자!
Arduino 프로그램은 구조는
void setup(){
//처음 한번만 실행되는 코드이다
//보통 Serial setting 이나
//초기값 setting을 작성한다.
}

void loop(){
//C언어의 for문과 같다.
//실제 돌리고자 하는 코드를 넣는다.
}
실습1. LED를 Blink 해보자!!
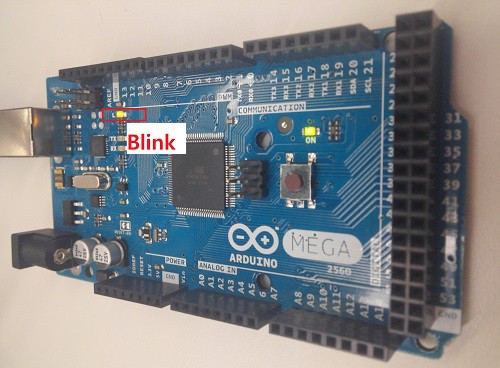
Arduino Mega2560 보드에 있는 LED를 사용하자.
Blink 실행 코드
// the setup function runs once when you press reset or power the board
void setup() {
  // initialize digital pin 13 as an output.
  pinMode(13, OUTPUT);
}
// the loop function runs over and over again forever
void loop() {
  digitalWrite(13, HIGH);   // turn the LED on (HIGH is the voltage level)
  delay(1000);              // wait for a second
  digitalWrite(13, LOW);    // turn the LED off by making the voltage LOW
  delay(1000);              // wait for a second
}
컴파일
스케치 > 파일/컴파일 or 아이콘 클릭
업로드
파일 > 업로드 or 아이콘 클릭

결과
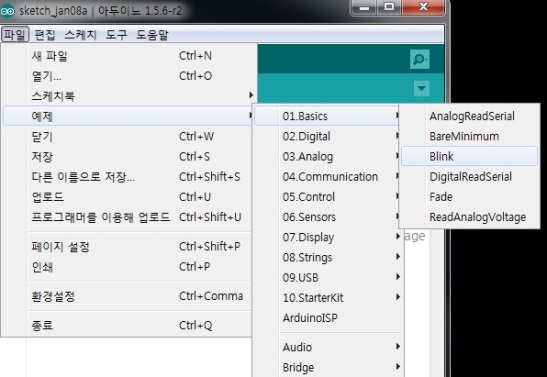
##Arduino IDE에서 제공하는 예제를 쓰고 싶다면?##